
macOS Ventura (macOS 13) is the new Mac operating system, and you’re probably here to learn how to use it with your Windows computer. This article will show you how to install macOS Ventura on VirtualBox on your Windows PC/laptop. We’ve also included links to download the macOS Ventura ISO file for VirtualBox, VBox codes, and the official VirtualBox.
Apple unveiled macOS Ventura at WWDC 2022, which includes a slew of exciting new features. It includes features such as Dark Mode, which allows users to switch between light and dark interfaces based on their preferences. It also has a new “Stacks” feature that organizes files by type in a simple interface. Ventura also includes Safari enhancements and changes to the Mail and Photos apps.
So, I’m sure most of you are excited to try and test Apple’s latest operating system, macOS Ventura. This guide will show you how to install macOS Ventura (macOS 13) in VirtualBox on your Windows PC.
Table of Contents
Steps To Install macOS Ventura in VirtualBox on Windows 10/11 PC
The following five steps will show you how to install and use macOS Ventura on your Windows PC using VirtualBox. Before we begin, you must first download the following file:
Download macOS Ventura (macOS 13) ISO Image
Note: Please remember to install macOS Ventura on an SSD-equipped PC; otherwise, it will run so slowly. Adding more RAM to your computer will also affect its performance.
Step 1. Download and Install VirtualBox and Its Extension Pack
Before installing macOS Ventura on your Windows PC, you must first install VirtualBox. If you don’t want to encounter issues while installing macOS Ventura, install the extension pack too. The mouse and keyboard may not work without the VirtualBox Extension Pack.
Download and install VirtualBox & Extension Pack
Step 2. Enable Virtualization on your PC
Modern CPUs have hardware virtualization technologies that make virtual machines in VirtualBox run faster. To use this feature, however, you must first enable it on specific PCs. If you don’t turn it on, you might get the error “Can’t open a session on the virtual machine” when installing macOS Ventura on VirtualBox. Here is how to enable virtualization on your PC.
Step 3. Create and Set Up a New Virtual Machine for macOS Ventura
The third step in installing macOS Ventura on a Windows 10 or 11 computer is to make a virtual machine that macOS Ventura will boot. To accomplish this, follow the steps below:
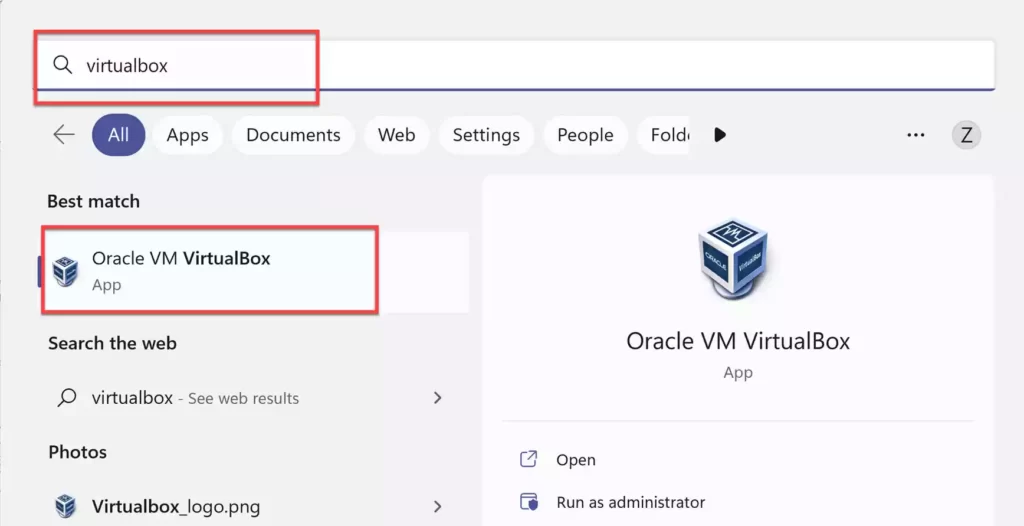
- Open the VirtualBox application by searching for it in the Start menu.
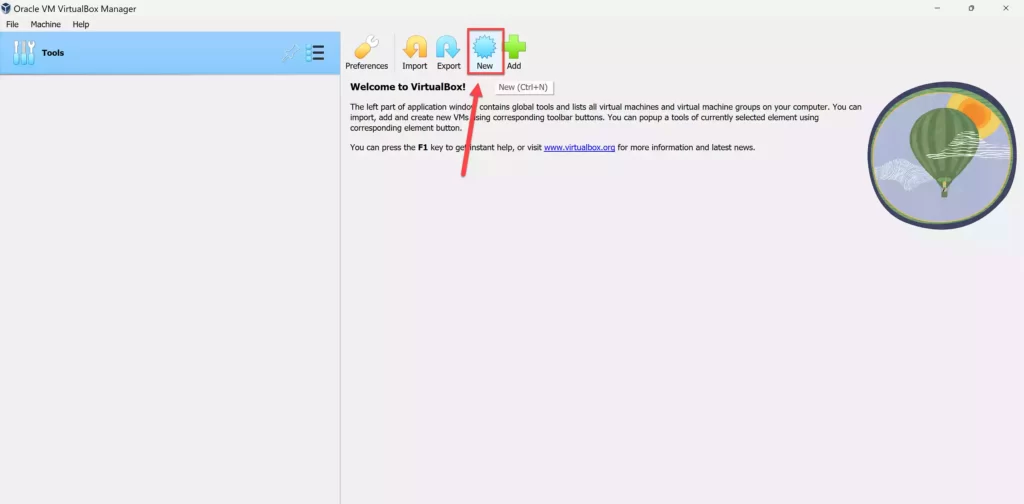
- Tap on New to create a virtual machine for macOS Ventura in VirtualBox.
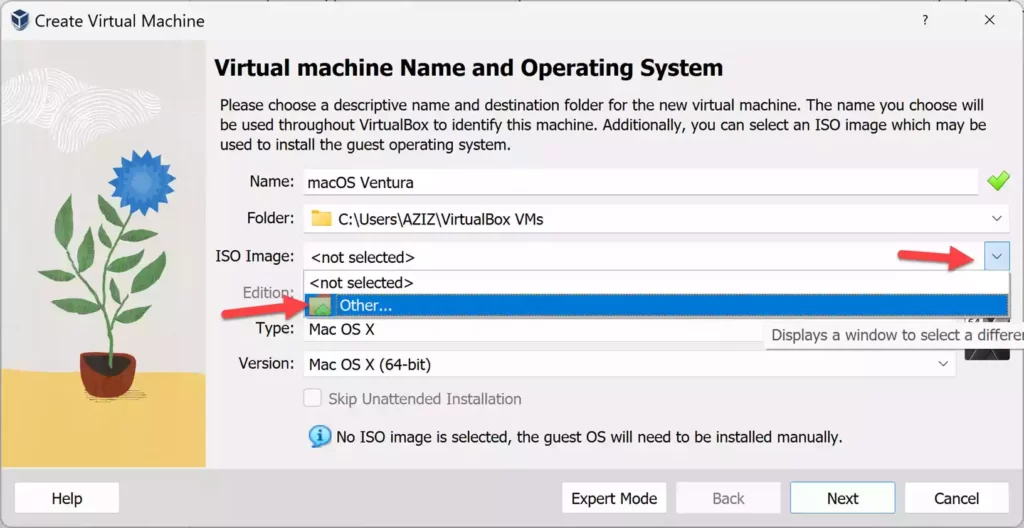
- Give your virtual machine a name and a location. Begin the name with macOS. Once macOS is typed, the VirtualBox will automatically select and type the macOS version.
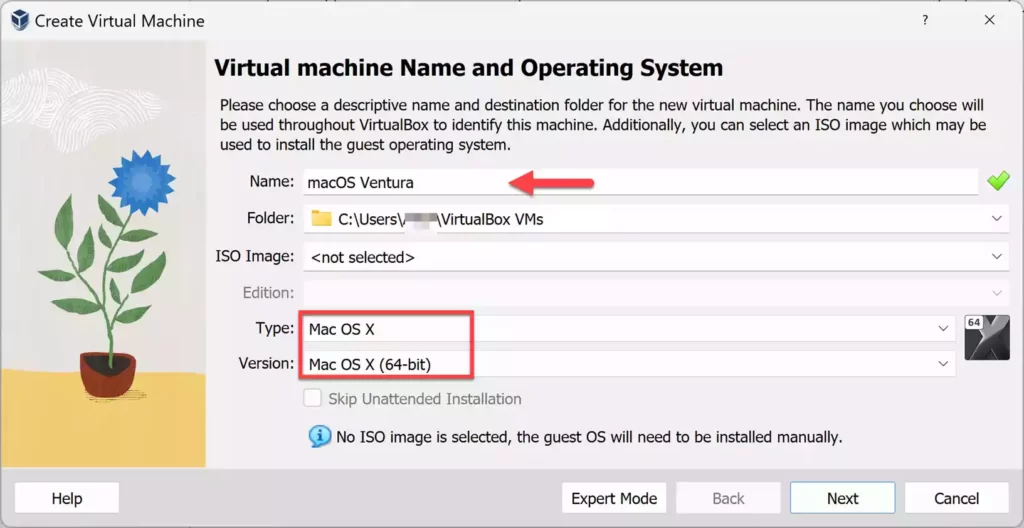
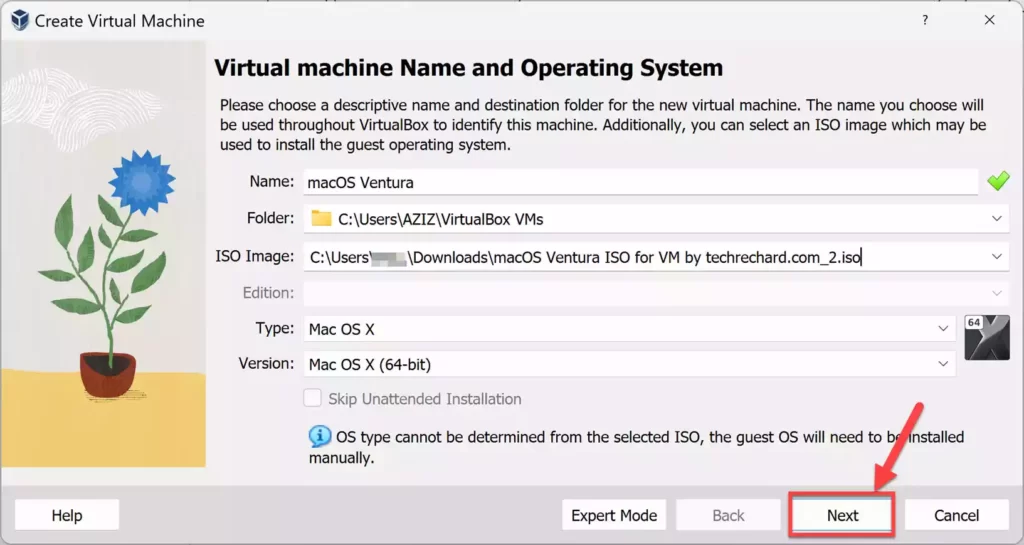
- Next, tap on the arrow in front of ISO Image, tap on Other, and add the macOS Ventura ISO file.
- After choosing a name and location for the virtual machine and adding the ISO image, tap Next to continue.
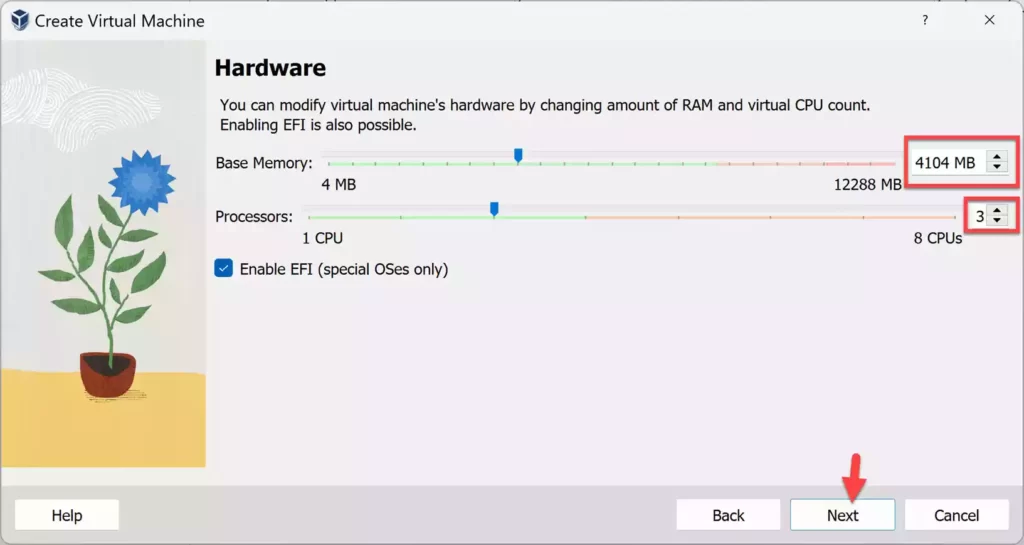
- Set the RAM (4 GB is recommended) and processor count (more than one) for the macOS Ventura virtual machine. When you’re finished, click Next. Please remember that more RAM and a faster CPU result in better performance.
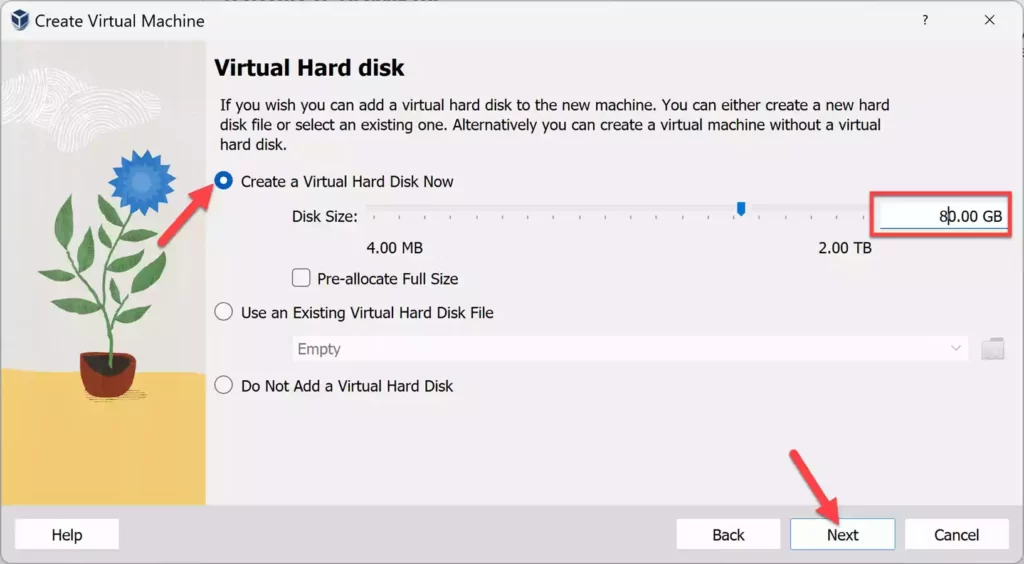
- Select Create a Virtual Hard Disk Now and set its size to anything near 80 GB. When done, tap Next.
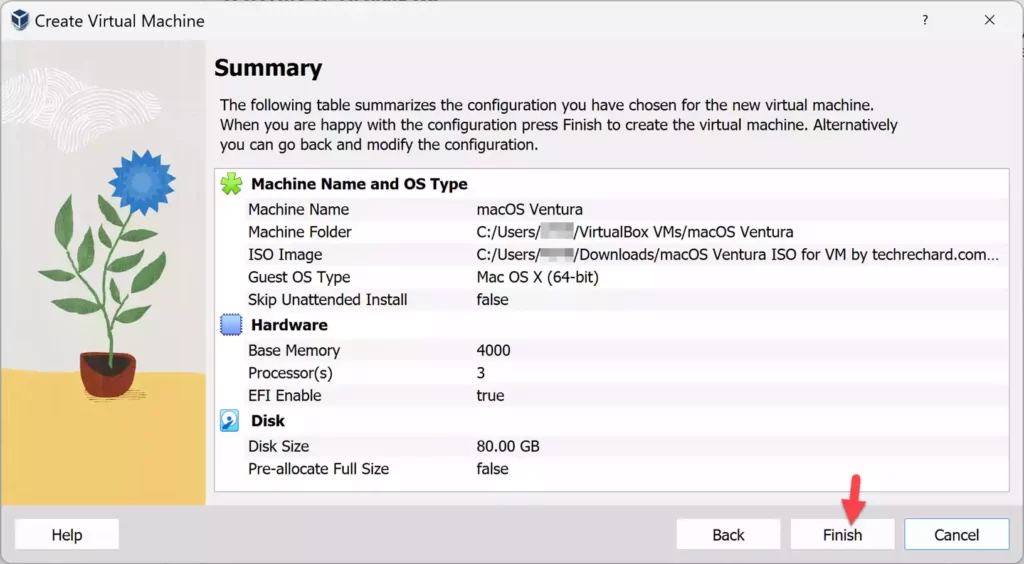
- That’s it! The table summarizes your configuration for the macOS Ventura virtual machine. If you are happy with the configurations, press Finish to create the virtual machine.
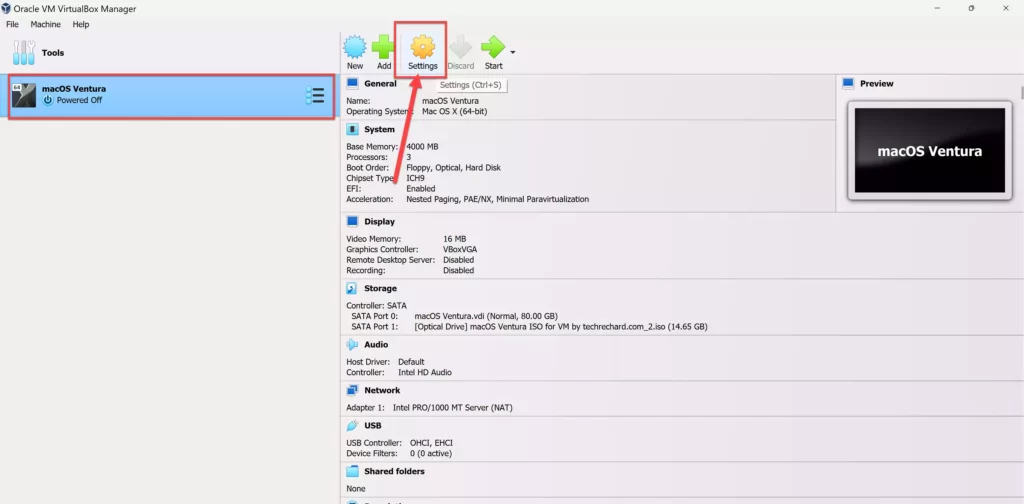
- Go to the newly created virtual machine and tap on Settings.
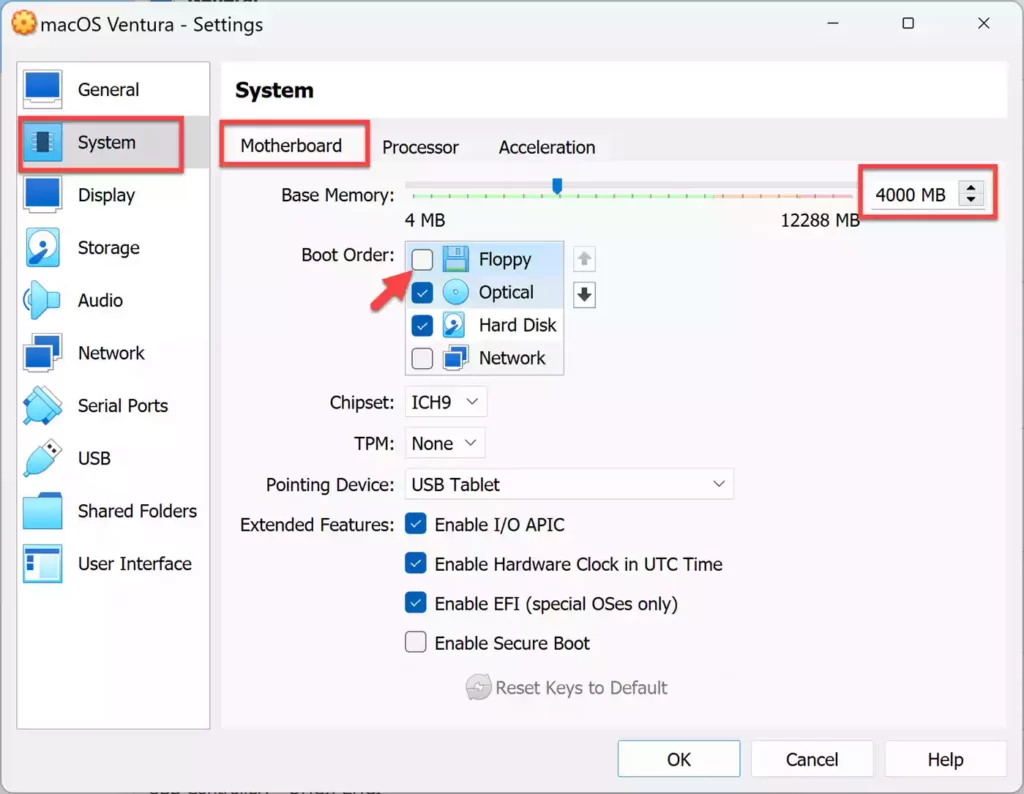
- Go to System and uncheck the Floppy option in the Motherboard tab.
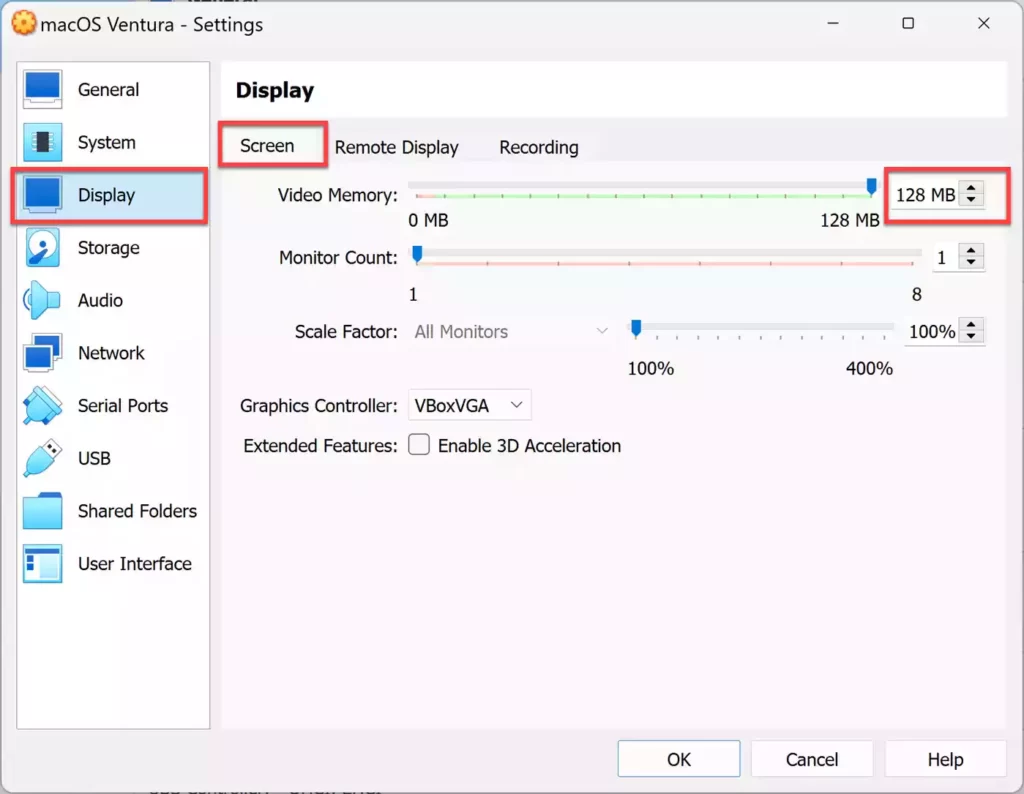
- Go to the Display and change the video memory to 128 MB, leaving the rest alone.
- Finally, click “OK” to save the changes.
Step 4. Run the VirtualBox codes for macOS Ventura on CMD
Installing and using macOS Ventura in VirtualBox on Windows 10 and 11 requires the VirtualBox code. If the code isn’t used or isn’t used right, the virtual machine running macOS will get stuck in a loop.
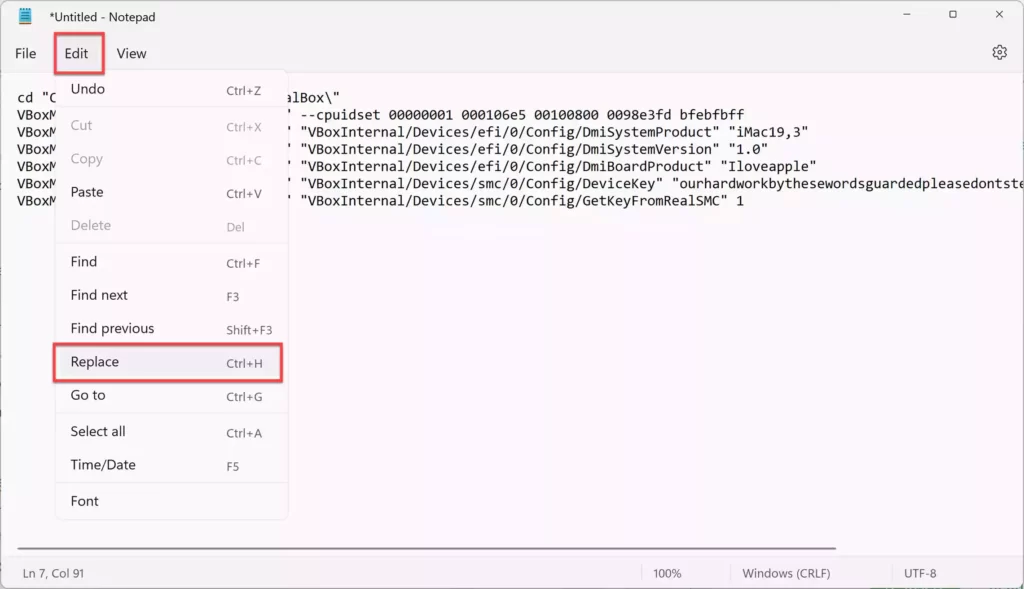
- Open the Notepad app on your PC, and copy and paste the below codes on your notepad.
cd "C:\Program Files\Oracle\VirtualBox\"
VBoxManage.exe modifyvm "Your VM Name" --cpuidset 00000001 000106e5 00100800 0098e3fd bfebfbff
VBoxManage setextradata "Your VM Name" "VBoxInternal/Devices/efi/0/Config/DmiSystemProduct" "iMac19,3"
VBoxManage setextradata "Your VM Name" "VBoxInternal/Devices/efi/0/Config/DmiSystemVersion" "1.0"
VBoxManage setextradata "Your VM Name" "VBoxInternal/Devices/efi/0/Config/DmiBoardProduct" "Iloveapple"
VBoxManage setextradata "Your VM Name" "VBoxInternal/Devices/smc/0/Config/DeviceKey" "ourhardworkbythesewordsguardedpleasedontsteal(c)AppleComputerInc"
VBoxManage setextradata "Your VM Name" "VBoxInternal/Devices/smc/0/Config/GetKeyFromRealSMC" 1
- Click the Edit menu, and select Replace.
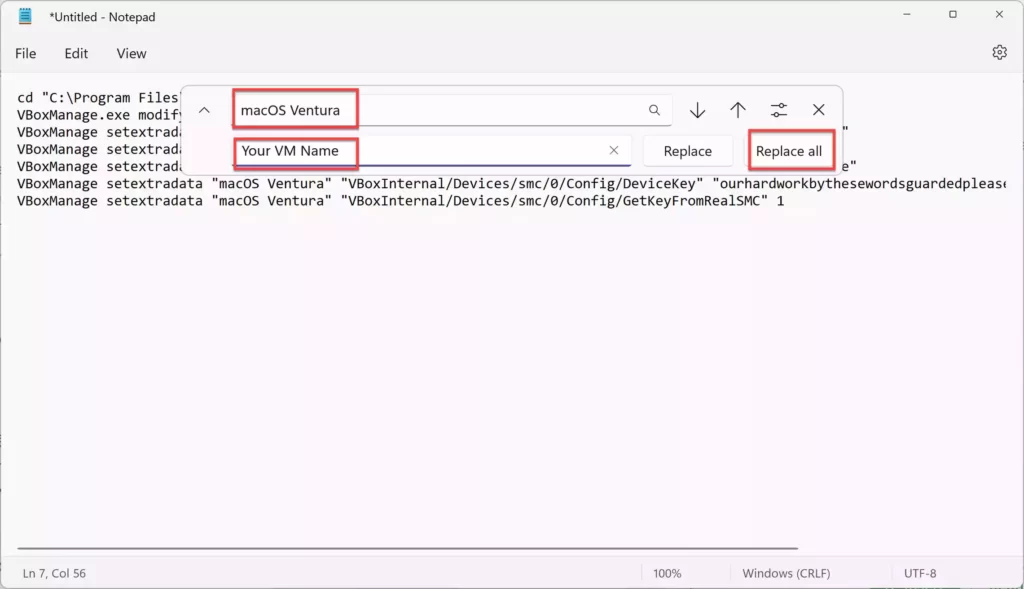
- Next, replace Your VM Name with the VirtualBox machine name you created a moment ago, and click Replace All to continue.
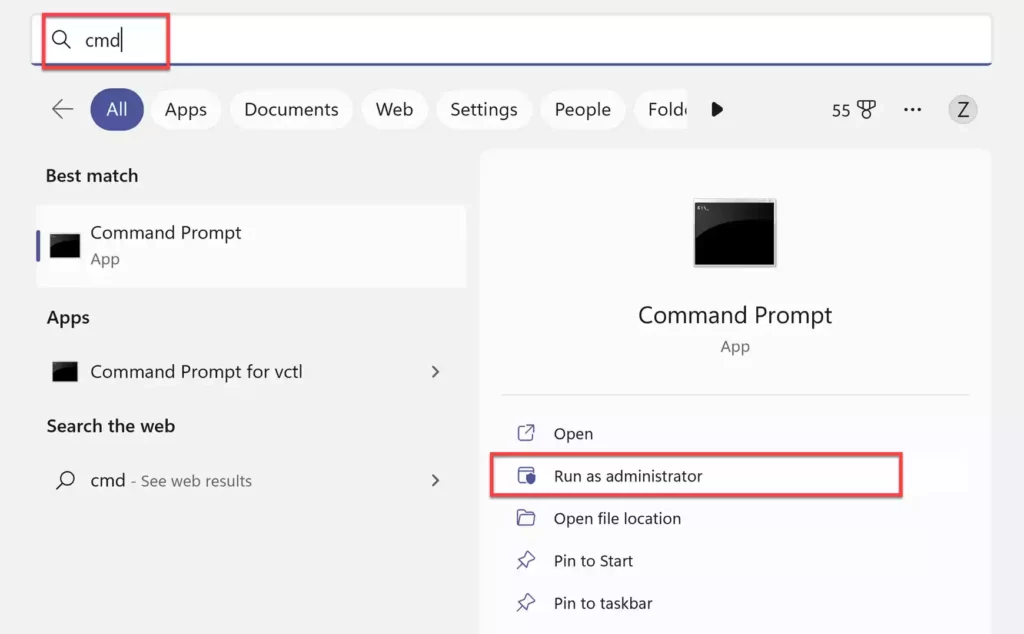
- Now, run Command Prompt as an administrator.
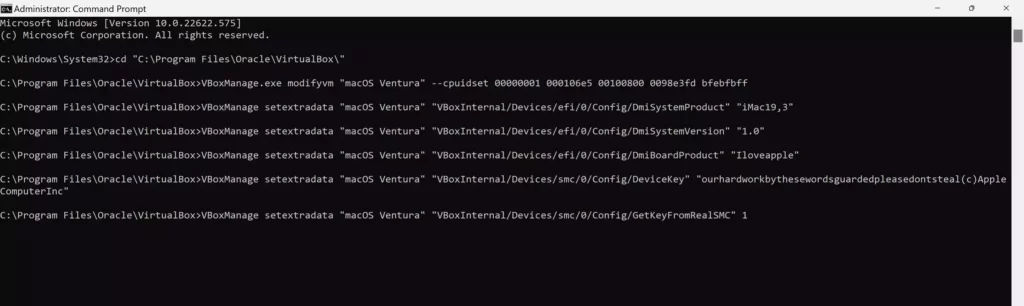
- Finally, copy the code, paste it into CMD, and hit Enter. Remember that if you enter the code incorrectly, you will receive an error. Try to paste it correctly.
Step 5. Install macOS Ventura in VirtualBox
After completing the previous four steps, this is the final step in installing and using macOS 13 Ventura on your Windows 10/11 PC in VirtualBox. It is now time to install macOS Ventura on VirtualBox from scratch. So let’s get this installation started.
- Open VirtualBox, select the virtual machine you created earlier for macOS Ventura and click Start.
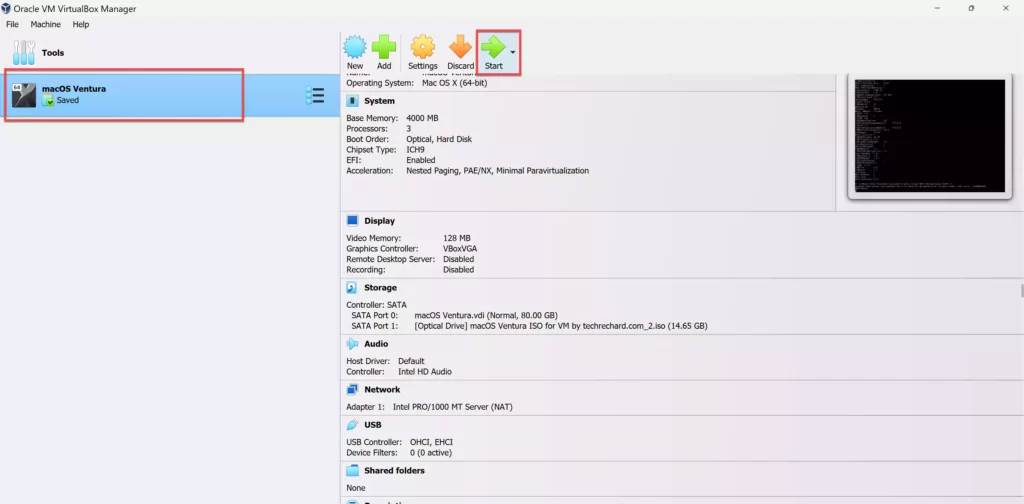
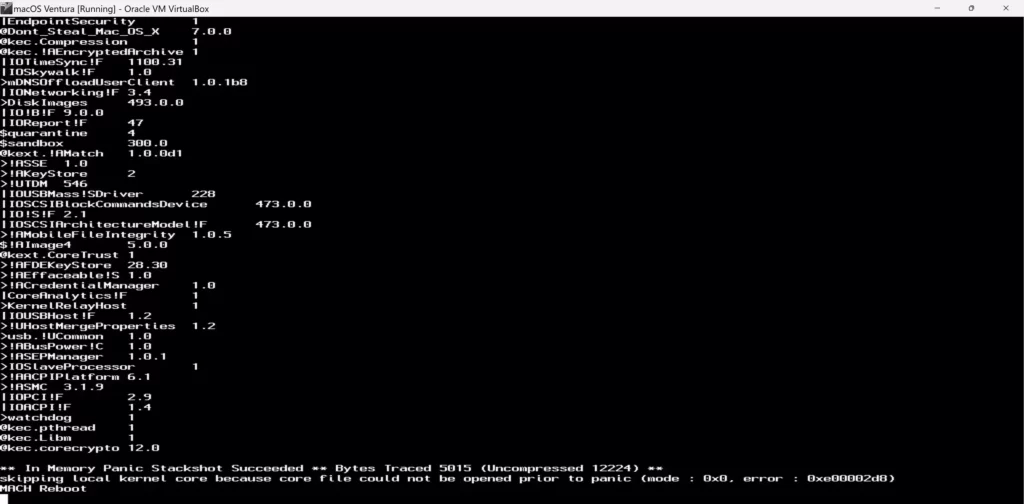
- Following that, a series of codes will flash on the screen before landing on the Apple logo.
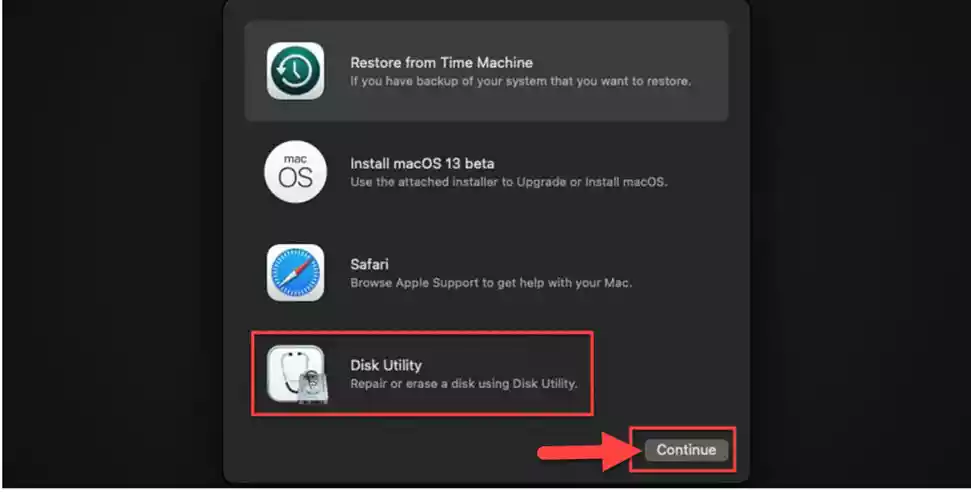
- Select your preferred language.
- Before installing macOS Ventura (macOS 13) on the VM, you must first partition the storage. Navigate to Disk Utility, and then click Continue.
- Select the storage you created when you created the macOS Ventura virtual machine, and tap Erase.
- After that, exit Disk Utility, select Install macOS 13 from the main menu, and then press Continue.
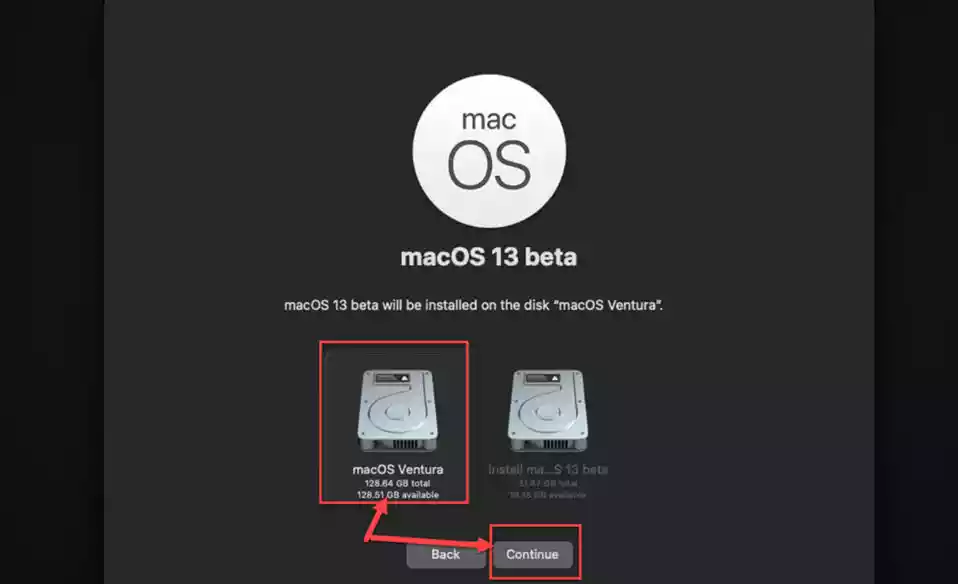
- Now, agree to the terms and conditions and select the disk to install macOS Ventura.
- Specify whether the national input keyboard should be enabled by default based on your location. When you’re finished, tap Continue twice more.
- Skip the accessibility by clicking on Not Now.
- Tap on Continue with data and privacy.
- Users migrating from another Mac or Windows PC can use Apple’s Migration Assistant. Because we are performing a clean installation, there is no need to configure it, so select Not Now.
- Read and accept the license terms and conditions for macOS Ventura.
- Create an account for your macOS Ventura VM, then click Continue.
- You’ll see that location services and device analytics are already enabled. You can disable them if you are concerned about your security and privacy.
- You can enable Screen Time from here if you want to track your weekly downtime, content, and privacy restrictions.
- The voice assistant is another feature that you can enable or disable. Given the popularity of voice assistants these days, you should try Siri. To add Siri, tap Continue.
- Choose your preferred macOS Ventura (macOS 13), look, and click the Continue button.
- Finally, macOS Ventura is successfully installed on VirtualBox.
That’s all! These steps are for installing macOS Ventura on VirtualBox on your Windows PC or laptop. Please write down any questions or problems you have in the comments section. Best wishes!
Read also:
How to Install macOS Ventura in VMware Workstation on Windows 10/11


Hi Aziz and thank you for this great tutorial.
I got stuck during install because macOS didn’t seem to recognize my mouse, even if I gave it control.
For anyone else following this tutorial, make sure you have the latest extension pack installed and that you have USB 3.0 support enabled.
Screenshot:
https://i.imgur.com/0ikfirk.png