
Install macOS Sonoma on VMware for a user-friendly interface, enhanced privacy settings, seamless integration with Apple devices, and avoiding specialized hardware. This offers endless possibilities for productivity and creativity, allowing access to exclusive software and applications only available on Apple devices. Additionally, running macOS Sonoma on VMware within a Windows setup allows easy switching between operating systems without dual-booting or purchasing separate hardware.
If you’re eager to experience the latest macOS operating system, macOS Sonoma (also known as macOS 14), and wondering if you can set it up on your Windows 10 or 11 machine, this guide is your ultimate resource. Learn how to install macOS Sonoma on VMware within Windows with the step-by-step instructions provided below.
Table of Contents
Step-by-Step Guide: Installing macOS Sonoma on VMware in Windows 10/11
Get ready to explore the new horizons of macOS Sonoma on your Windows machine. Follow these clear and concise steps to effortlessly install macOS Sonoma on VMware within your Windows 10 or 11 environment.
1. Acquire the necessary files
Before you dive into the installation process, ensure you have the required files on hand. Download the following essential components:
2. Enable virtualization on your Windows PC.
Enable virtualization on your Windows 10 or 11 PC to create a conducive environment for running multiple operating systems on a single physical machine. Activate this technology for enhanced software isolation and resource optimization.
3. Install VMware Workstation on your Windows PC.
Download and install VMware Workstation Pro or Player on your Windows PC to facilitate the installation of macOS Sonoma. Create a virtual machine tailored to run macOS Sonoma efficiently.
4. Unlock VMware for macOS Sonoma installation.
Unlock VMware for macOS Sonoma installation by following these steps:
- First, Close VMware Workstation by tapping on Exit in the File menu.
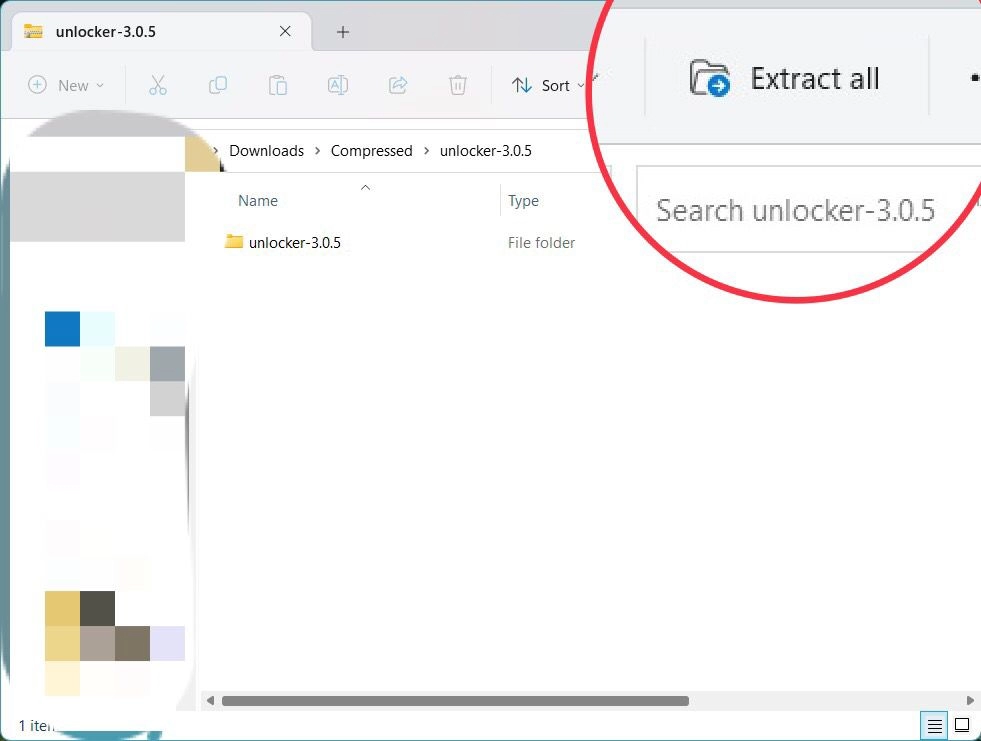
- Now tap on Extract All to extract the downloaded VMware Unlocker.
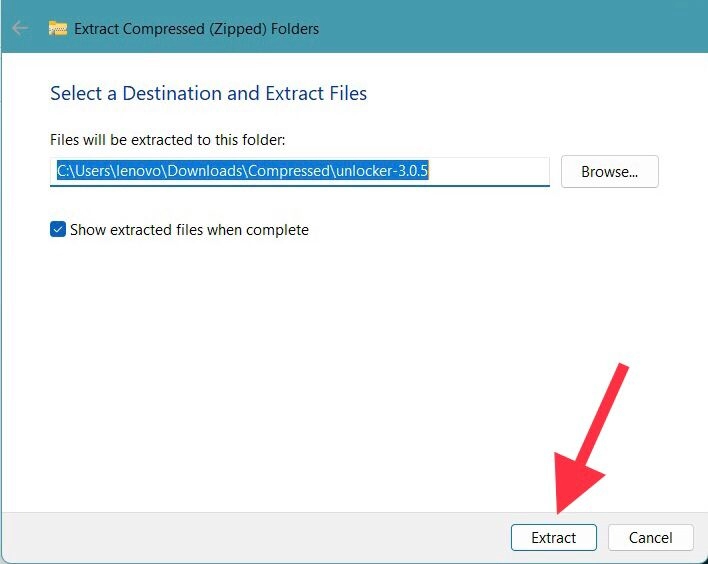
- Now tap on Extract.
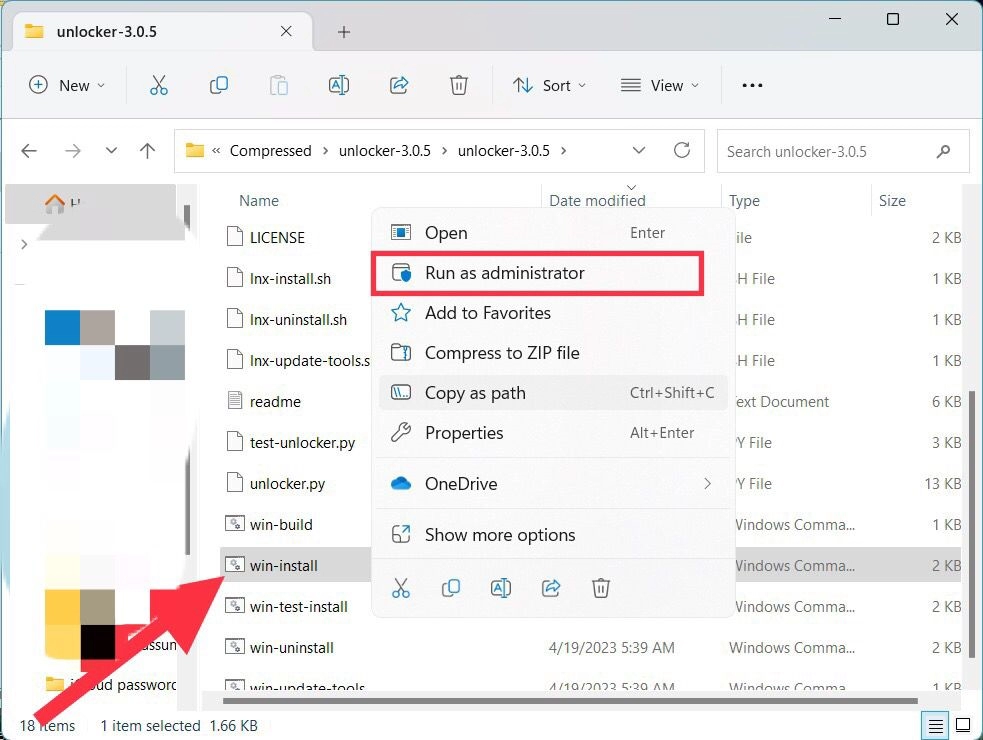
- Now right-click on (win-install.cmd) and Run as Administrator.
5. Create and customize your macOS Sonoma virtual machine.
Build a customized virtual machine to host macOS Sonoma:
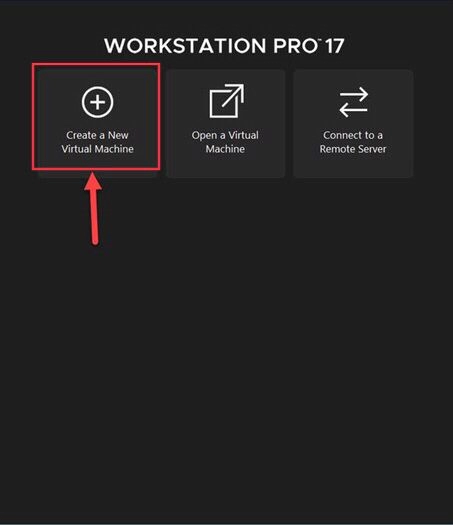
- Open VMware Workstation and tap on Create a New Virtual Machine.
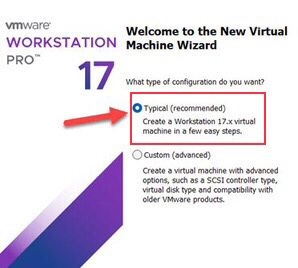
- Select Typical (Recommended) and tap Next to continue.
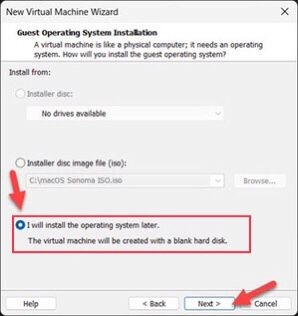
- Now tick the I will install the operating system later option and click Next.
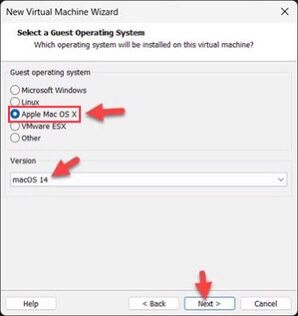
- Navigate to MacOS 14 > Apple Mac OX and tap Next.
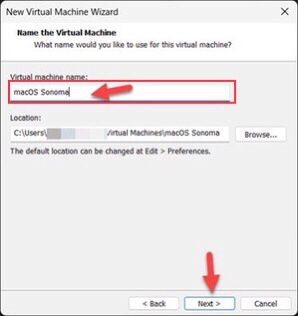
- Now name your VM (macOS Sonoma or macOS 14) and tap Next.
- Then specify the Disk Size (80GB) and tick Store virtual disk as a single file, then click Next.
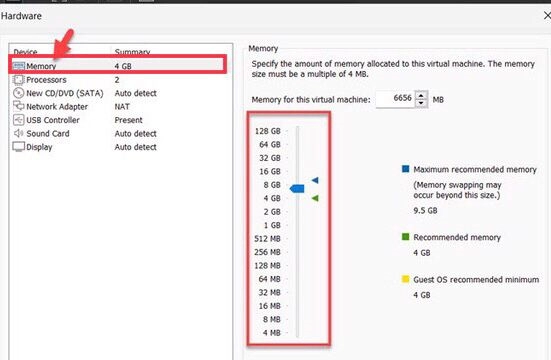
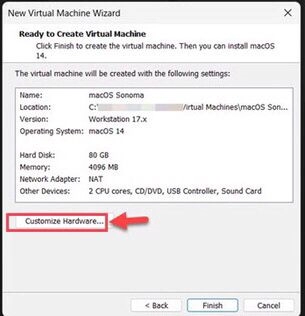
- Now for customization, tap on Customize Hardware and increase the Memory to 4–8 GB for better performance.
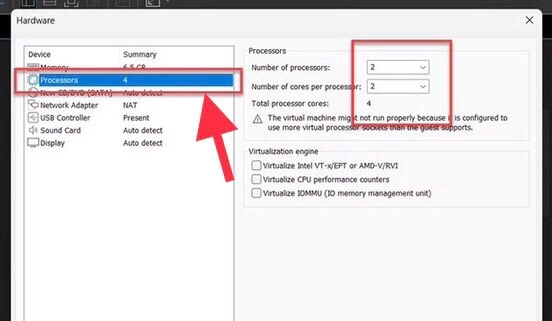
- Navigate to Processor and increase the CPU processor.
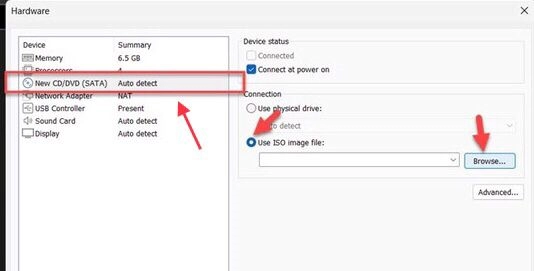
- Tap on New CD/DVD (SATA) and check the Use ISO image file option, then Browse.
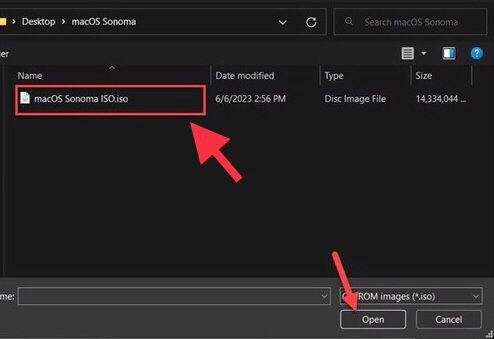
- Select the macOS Sonoma ISO file and tap to Open it.
- Now Close the menu to save the changes.
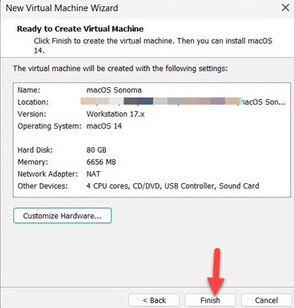
- Finally, tap on the Finish option.
6. Edit the macOS Sonoma VMX file.
- Right-click on macOS Sonoma.vmx and select Notepad or any other PDF editor.
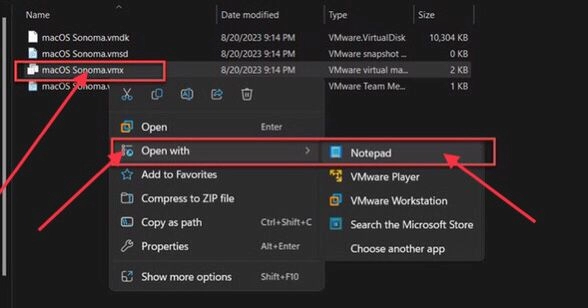
- Customize your VM configuration by adding the code (smc.version = ‘0’) to the macOS Sonoma VMX file.
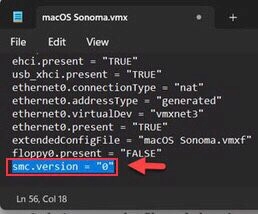
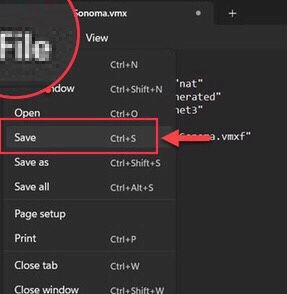
- Then go to File and tap Save to save the changes.
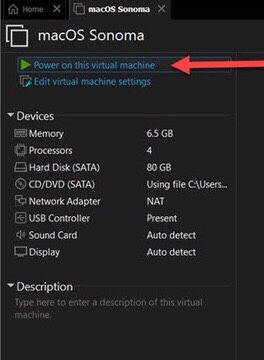
7. Install macOS Sonoma on VMware.
Initiate the installation process for macOS Sonoma on VMware:
- First, open VMware and tap on Power on this virtual machine.
- Select your preferred language.
- Go to Disk Utility and tap Continue.
- Now select VMware Virtual SATA Hard Drive Media and click Erase.
- Type macOS Sonoma for NAme, choose macOS Extended (Journaled) for Format and GUID Partition Map for Scheme.
- Then tap Erase.
- After that, tap Done.
- Now Quit the Disk Utility and tap on Install macOS 14 Beta.
- Tap the Continue button twice.
- Now accept the Terms and Conditions and tap Agree.
- The installation will begin and be complete in 40–60 minutes.
Once the installation is complete, you’re ready to explore the innovative features and enhancements of macOS Sonoma, seamlessly integrated into your Windows 10 or 11 setup.
You can install macOS Sonoma on VirtualBox in Windows.
Conclusion
MacOS Sonoma has been successfully installed on VMware on a Windows 10 or 11 system. With the strength of macOS Sonoma and the ease of your Windows PC, you may now have the best of both worlds. If you have any queries or need further assistance, don’t hesitate to share them with us in the comments section below.
Read also:
Download macOS Sonoma DMG File For clean installation
How To Download macOS Sonoma Full Installer Database (Direct Apple Links)


Наиболее стильные новинки подиума.
Абсолютно все новости лучших подуимов.
Модные дома, торговые марки, высокая мода.
Лучшее место для стильныех хайпбистов.
https://furluxury.ru/