On an iPhone, screen recording is very easy and can be done in a number of ways, including by tapping the screen record icon in the control centre or by using the tap feature on the home or back buttons. However, you might be wondering how to screen record on a Mac.
Well, like on the iPhone, there are multiple and easy ways to screen record on the Mac through keyboard shortcuts and the built-in app for screen recording.
This iChumz article will demonstrate every method for recording the screen on Mac OS 13. These techniques are quick and effective, whether you record a video of your entire screen or part of it.
Table of Contents
Screen record your Mac’s screen
#1. Via keyboard shortcut
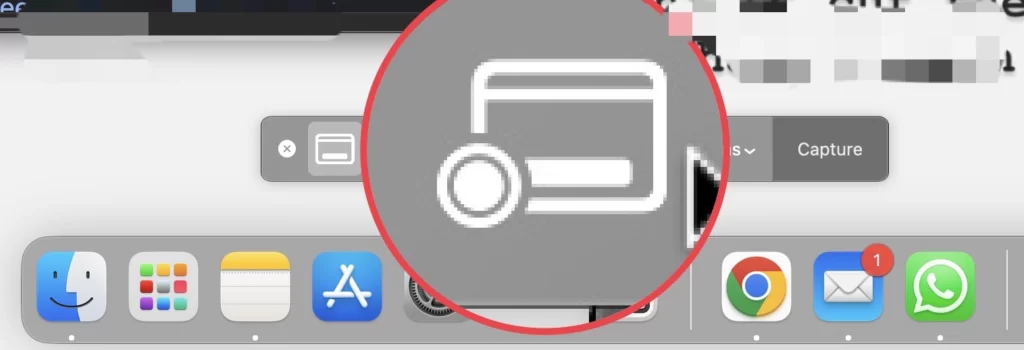
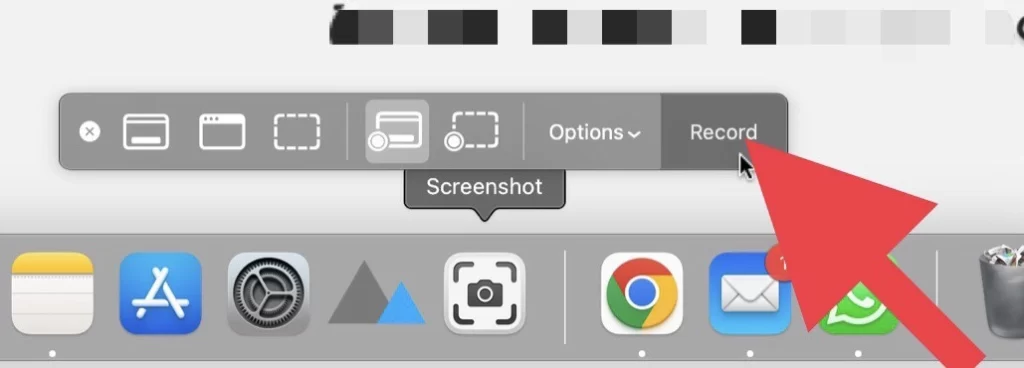
- Press Command+Shift+5 on the keyboard and the screenshot toolbar will appear.
- Then choose the screen record type from the screenshot toolbar. If you want to record the whole scene, tap on the entire screen recording option.
- but if you want to record a specific section of the screen, then tap on the Record Selected Portion option.
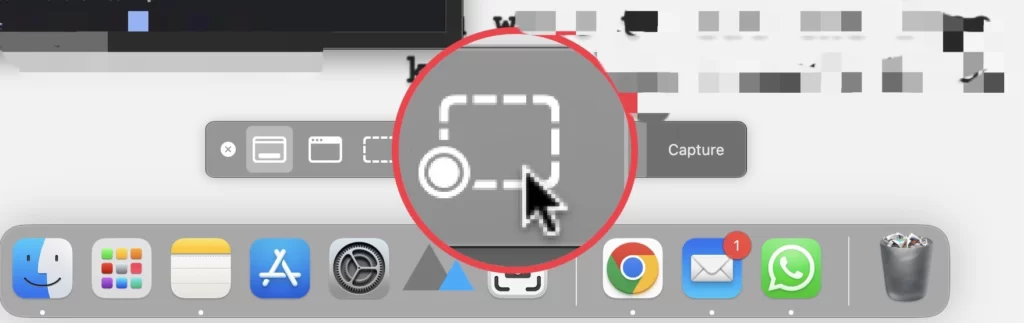
- After selecting the record type, tap on the Record button in the toolbar.
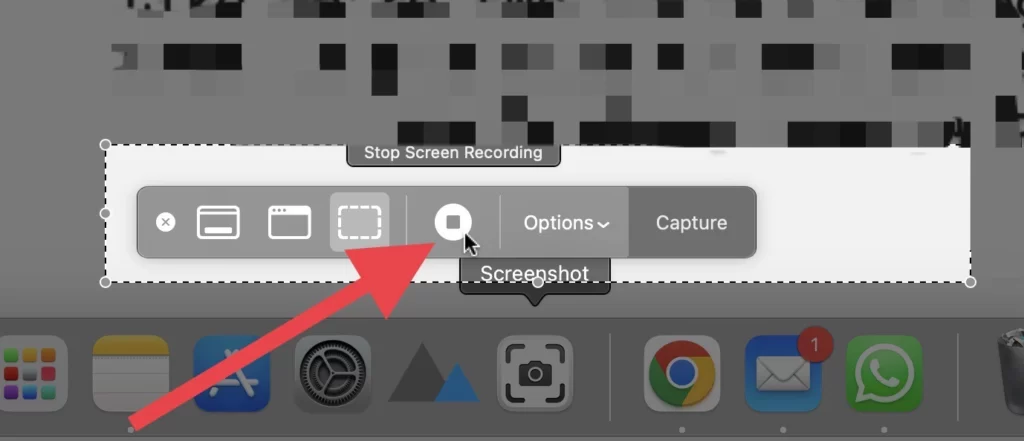
- And in case you want to stop, you can tap the Cancel button or Esc button on your keyboard.
- When the screen recording is complete, to stop it, press Command+Control+Escape (Esc) on the keyboard or tap on the Recording icon in the screenshot toolbar.
Record audio in screen recording
If you want to record the studio on-screen on your Mac, then do as mentioned below.
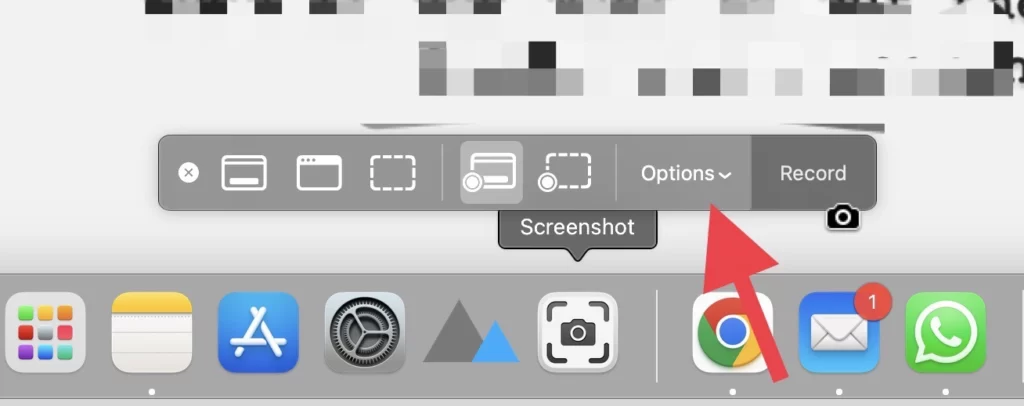
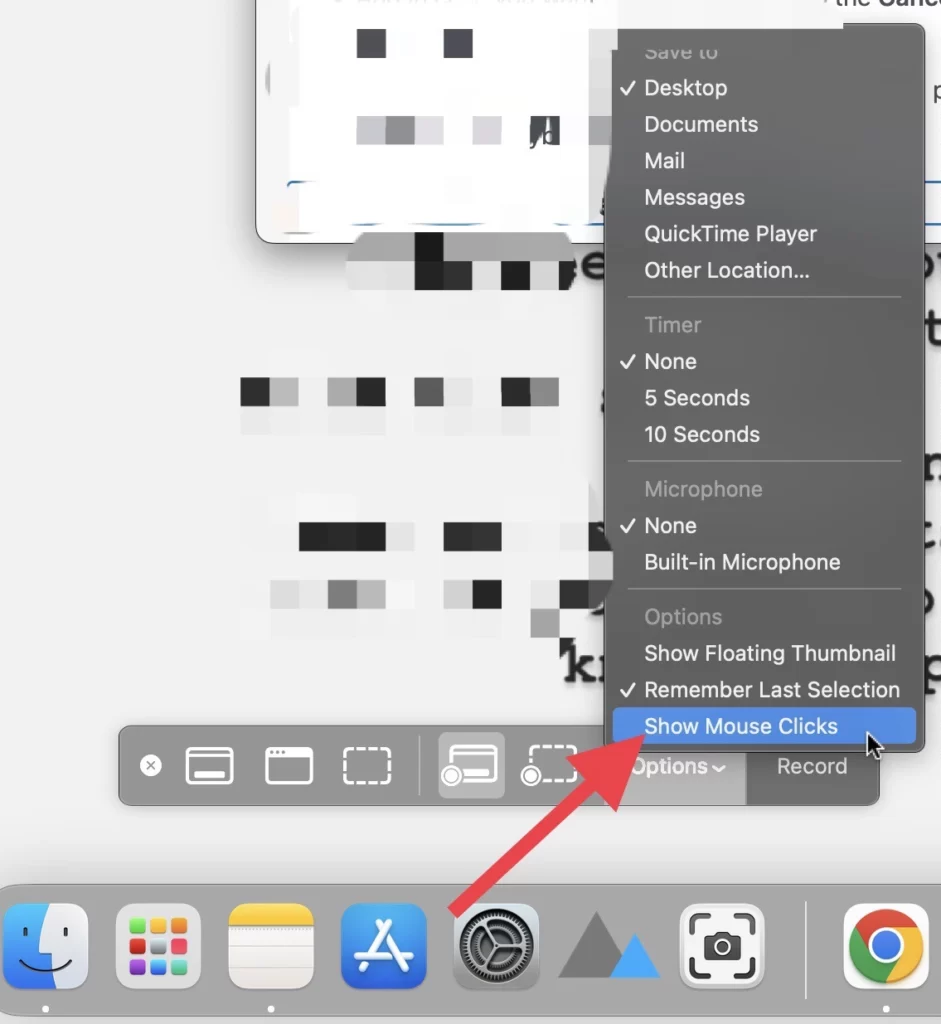
- Tap on Options in the screenshot toolbar.
- Then select the built-in microphone.
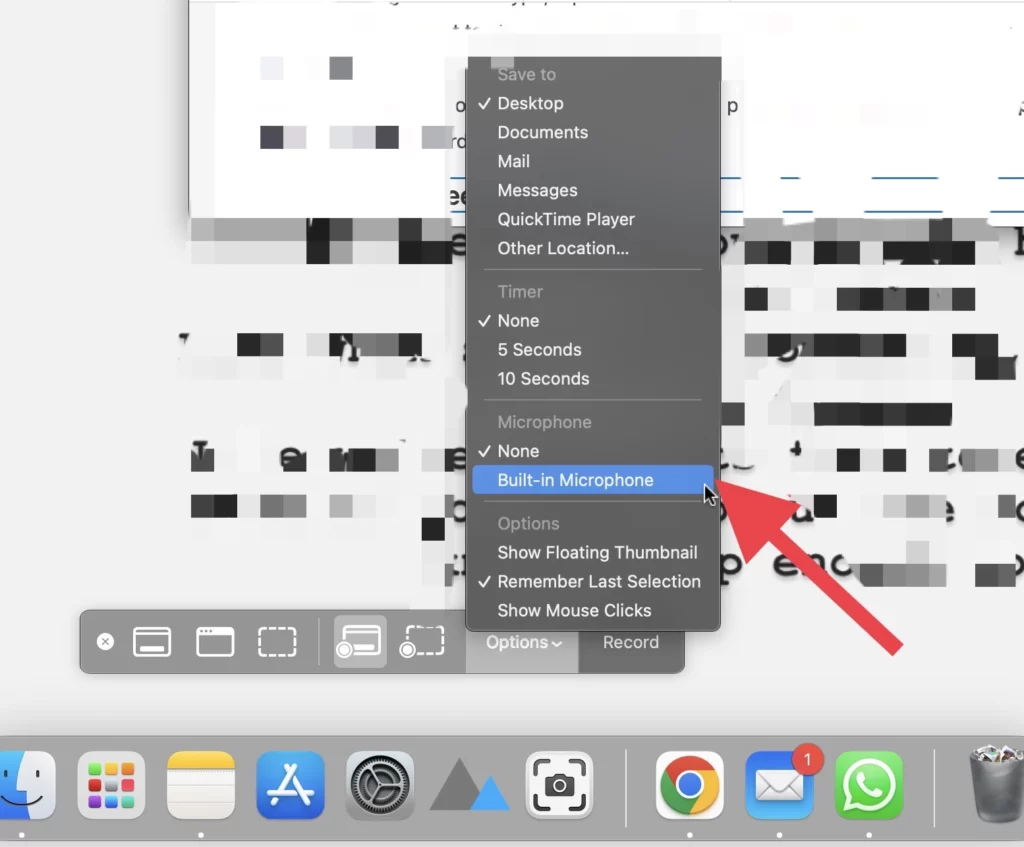
- Tap on Options and select Show Mouse Clicks to record mouse clicks on the screen.
That’s it. You have screen recorded your Mac screen with audio and mouse clicks.
#2. via Quick Time Player
The other way to record screens is through QuickTime Player, as mentioned in the steps below.
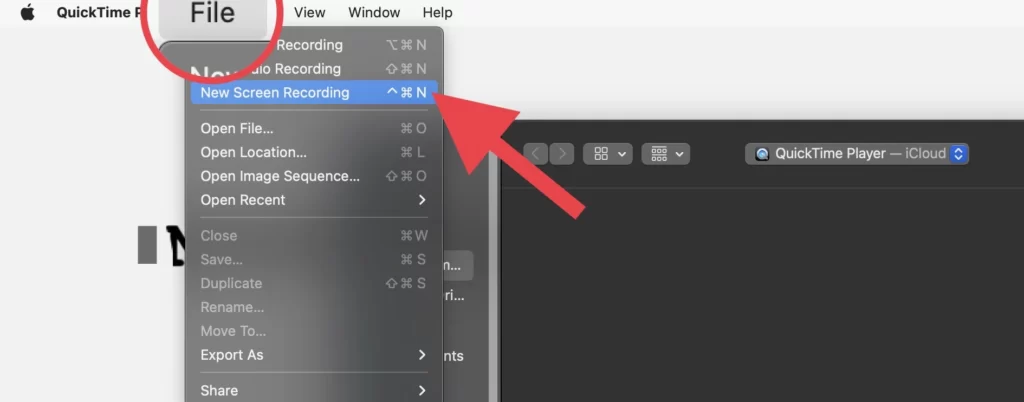
- Open QuickTime Player on your Mac.

- Next, tap on File in the menu bar.
- And select New Screen Recording.
Conclusion
These are the ways to screen record your Mac, and the built-in screen recorder in macOS lets you choose whether to capture the whole screen or just a portion of it. Finally, let us know in the comments section below if you have any queries or ideas.
Read also:
[2023] How to Back Up Mac Contacts in MacOS
How To Download macOS Big Sur DMG File 11.7.6 Latest Version